
Best Practices for Safety, Performance, and Scalability
1. Why Parallel Battery Management Matters
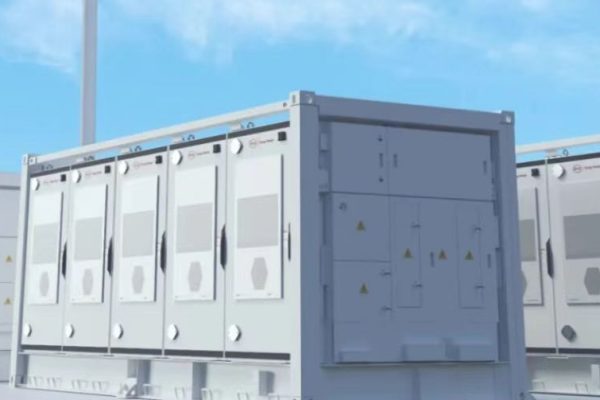
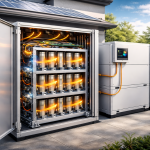
In the home energy storage space, scaling capacity by connecting multiple battery packs in parallel is a common and practical solution. Whether you’re dealing with modular rack batteries or wall-mounted lithium packs, parallel connections help homeowners:
- Expand storage over time
- Replace individual units without downtime
- Customize capacity based on budget
But this flexibility comes with technical challenges: voltage mismatch, uneven current sharing, communication issues, and safety risks.
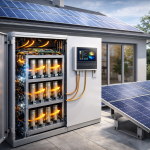
This article explores how to manage parallel battery packs effectively in residential systems, especially when using LFP (LiFePO₄) batteries with hybrid inverters.
2. What Does “Parallel Battery Management” Mean?
Parallel connection means joining multiple battery packs positive-to-positive and negative-to-negative so they share the same system voltage, but provide increased current capacity.
For example:
- 3 x 48V 100Ah batteries in parallel = 48V, 300Ah total
- Energy = 48V x 300Ah = 14.4 kWh
This method is preferred over series in most home systems due to simpler voltage control and compatibility with standard hybrid inverters.
3. Key Benefits of Parallel Configuration
✅ Modularity: Add or replace batteries over time
✅ Redundancy: One pack fails, others still work
✅ Ease of Use: Most hybrid inverters support 48V parallel batteries
✅ Budget Flexibility: Install in phases as funds allow
But poor parallel design leads to:
❌ Uneven wear
❌ BMS communication conflicts
❌ Overheating or imbalance
❌ Reduced battery life
4. Rules for Safely Connecting Battery Packs in Parallel
To avoid these pitfalls, follow these golden rules:
✅ 1. Use Identical Battery Models
- Same brand, chemistry, capacity, voltage, and firmware
- Avoid mixing old and new models unless approved by the manufacturer
Why? Slight variations in internal resistance or cutoff voltage will lead to uneven current sharing and degradation.
✅ 2. Voltage Match Before Connection
- Fully charge each battery to the same voltage (±0.05V) before wiring
- Use a multimeter to verify
- Optional: Let the batteries sit disconnected for 30–60 minutes after charging to stabilize
✅ 3. Same Cable Length & Gauge
- Use equal-length cables for each pack to the inverter or busbar
- Choose wire size based on current load (e.g., 25mm² or 35mm² for 100A systems)
Why? Unequal resistance = unequal current = imbalance and heat
✅ 4. Centralized Busbar or Combiner Box
- Use a common busbar or combiner box for all connections
- Avoid daisy-chaining battery-to-battery
- Fuse or circuit-break each pack individually for protection
✅ 5. Activate BMS Synchronization (If Available)
- Many brands (e.g., Pylontech, Dyness, Seplos) support parallel BMS communication
- Use CAN or RS485 sync cables
- Configure master-slave logic per manual
Benefit: Better SoC estimation and uniform charge/discharge behavior
✅ 6. Limit Number of Packs per String
- Most manufacturers recommend max 4 to 6 units per string
- For >6 units, use multiple parallel strings with their own fuses, or consult the supplier
✅ 7. Software Configuration in the Inverter
- Set correct battery type (e.g., LiFePO₄)
- Set battery capacity based on total Ah
- Enable BMS communication protocol (CAN/RS485) if supported
- Otherwise, set voltage/cutoff values manually
5. Common Mistakes to Avoid
| Mistake | Risk |
|---|---|
| Mixing different battery brands or sizes | Uneven SoC and premature aging |
| Connecting batteries with different SoC | Sudden high current rush, BMS trips |
| Using different cable lengths | One battery works harder, overheats |
| Ignoring BMS sync settings | Inaccurate readings, uneven cycling |
| No fuses per battery | Whole system fails if one short-circuits |
6. How to Expand an Existing Battery System
If a homeowner wants to add more batteries later, follow these steps:
- Shut down the inverter and all batteries
- Charge the new pack to same voltage as existing ones
- Use identical cables and connectors
- Connect to same busbar
- Re-sync BMS, if needed
- Update inverter’s total capacity setting
- Test for balanced current during operation
7. Monitoring and Maintenance Tips
- Check SoC and voltage of each pack monthly
- Use a BMS monitoring tool or app
- Look for signs of imbalance:
- One battery draining faster
- Heat generation differences
- System warnings or faults
Tip: Some advanced setups support individual pack monitoring via BMS, or even shut-off of only one faulty pack while others continue to work.
8. Should You Use a Battery Management Module (BMM)?
A Battery Management Module acts as a gateway between multiple battery packs and the inverter. Use one if:
- Your inverter only supports one BMS input
- Your battery brand does not support native parallel BMS communication
- You need additional safety interlocks or balancing
Popular with:
- DIY setups
- Brands that offer “dumb” LFP packs without active communication
9. Summary: Key Takeaways
| Do | Don’t |
|---|---|
| Use same battery model, voltage, SoC | Mix brands or new/old packs |
| Connect via busbar with equal cables | Daisy-chain connections |
| Enable BMS sync if available | Skip communication setup |
| Use per-pack fuses | Rely only on one master fuse |
| Monitor monthly | Assume “plug-and-forget” |
10. A Scalable, Safe Path to Energy Independence
For homeowners and installers, managing battery packs in parallel unlocks affordable scalability, reliability, and peace of mind—but only when done with attention to detail.
Whether you’re designing a 10kWh backup system or building a 30kWh off-grid setup, getting parallel battery management right ensures safe operation, long lifespan, and happy clients.