


Tips for First Installations That Build Trust and Market Confidence
Why Start with a Pilot?
If you’re a solar distributor or energy entrepreneur looking to expand into battery storage, your first installation matters more than your first shipment. A well-executed pilot project does three things:
- Builds trust with your local market
- Creates a physical reference for future clients
- Gives your team hands-on learning before scaling
Whether you’re working with 5kWh systems for homes or 50kWh units for small businesses, a strategic first deployment helps you position yourself not just as a product seller — but as a capable technical partner.
This guide outlines how to build an effective pilot storage project that sets the tone for your growth.
Step 1: Define Your Pilot Objective
Before choosing brands or wiring layouts, define what this pilot needs to prove. Your goal could be:
- Showing backup power in grid outage areas
- Demonstrating peak shaving in small industrial settings
- Building a local testbed for future system rollouts
- Training your installer partners or internal team
- Providing a walk-in demo site for customers
📌 Tip: Don’t try to do everything. One clear purpose is enough for a pilot.
Step 2: Choose the Right Pilot Site
For your first system, site conditions are just as important as specs. The ideal pilot site should be:
- Easily accessible (not too remote or high-risk)
- Representative of your target market (e.g., home, shop, farm)
- Owned or operated by a trusted partner or early adopter
- Willing to allow regular monitoring and visits
- Flexible on design iterations if needed
If you’re a distributor, installing a system in your own office or warehouse can double as a sales showroom and training hub.
Step 3: Pick Simple, Reliable Components
In pilot systems, reliability and ease-of-use are more valuable than advanced features. Choose components that are:
- Pre-integrated or all-in-one, to reduce commissioning errors
- Modular and scalable, so future upgrades are easy
- From brands with technical support and clear documentation
- Known to work together (e.g., inverter and battery compatibility is tested)
Example setups for small pilot projects:
| Site Type | Size | Suggested Setup |
|---|---|---|
| Rural Home | 5kW / 10kWh | Hybrid inverter + LFP battery + AC loads |
| Office Building | 10kW / 20kWh | AC-coupled system with EMS monitoring |
| Farm or Factory | 15kW / 30kWh | 2-string PV + hybrid + high-voltage rack |
📌 Tip: Choose lithium iron phosphate (LFP) batteries if safety and cycle life are priorities.
Step 4: Keep the Layout Simple
For a first system, avoid overcomplicating the structure. A clear, modular layout:
- Reduces installation time
- Makes component behavior easier to troubleshoot
- Helps clients visually understand the solution
Examples of clean pilot layouts:
- Wall-mounted hybrid inverter + floor battery cabinet
- Rack-mount 48V system with combiner + inverter cabinet
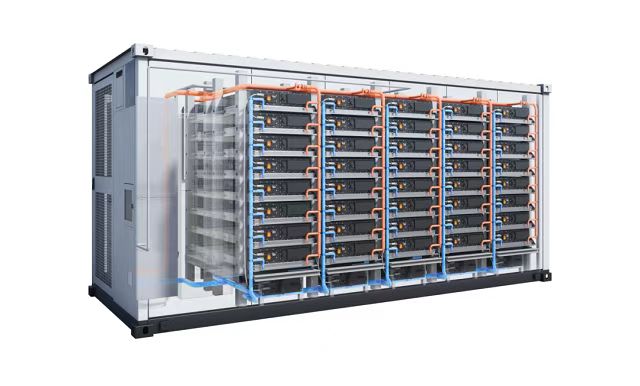
- Containerized setup with transparent labeling for demo use
Include clear signage and visual meters/screens so visitors can see what’s happening.
Step 5: Involve the Client in the Process
A pilot project is also an educational tool. Invite the client to:
- Review system sizing logic
- Learn basic monitoring/dashboard usage
- See how performance evolves over days or weeks
Your goal is not just a working system — it’s a client who becomes your advocate. Ask for:
- Photos and testimonials
- Data access for case studies
- Permission to bring new prospects to visit
Step 6: Prepare for Support & Data Collection
Plan in advance how you will monitor performance and support the site:
- Use systems with built-in Wi-Fi or RS485-to-cloud data upload
- Assign one technician to check logs for the first 2 weeks
- Track battery SoC, charge/discharge events, PV generation, and grid interaction
- Record how the system responds during outages or peak hours
This data becomes critical for:
- Troubleshooting
- Marketing future projects
- Optimizing your next installation
Common Pitfalls in First Projects (and How to Avoid Them)
| Pitfall | Solution |
|---|---|
| Mismatched inverter and battery comms | Pre-confirm protocol: CAN, RS485, or Modbus compatibility |
| Oversizing PV relative to inverter | Check hybrid inverter PV input limits |
| Underestimating surge load needs | Include 20–30% margin in inverter sizing |
| Poor ventilation in battery room | Follow cabinet airflow and thermal spacing guidelines |
| No backup circuit isolation | Install critical load panel or dedicated backup switch |
Step 7: Use the Pilot as a Growth Engine
Once your pilot system is running smoothly:
- Invite new customers to visit
- Share monitored performance graphs online
- Turn lessons learned into sales materials
- Host a short workshop for local installers
- Create a short video walkthrough in your local language
📌 Remember: This project is not just about today’s ROI — it’s your technical credibility on display.
What Clients See in a Pilot
To non-technical buyers, a pilot project is not just about specs. It helps them answer:
- “Will this work for me?”
- “Can I trust this distributor to support it?”
- “Does it look neat and safe?”
- “Is this the brand I want to associate with?”
By making your first system visible, understandable, and well-supported, you shorten the sales cycle for the next 10 systems.
Conclusion: Don’t Just Sell — Demonstrate
As a distributor, your edge isn’t just access to products. It’s your ability to connect product to application, and prove it with a real-world, working system.
A well-designed pilot:
- Builds confidence for your team and clients
- Creates marketing momentum
- Establishes your brand in the energy storage space
- Helps you gather valuable feedback before large-scale rollout
Start simple. Document everything. Support it well. Let the pilot speak for you.