Ensuring Performance, Safety, and Reliability in Energy Storage Exports
In the global energy storage and solar inverter market, quality control (QC) before shipment is not just a formality — it’s a business-critical step that determines your brand reputation, client satisfaction, and warranty cost.
When exporting inverters or hybrid inverter systems, buyers often ask detailed technical questions about testing procedures, inspection reports, and QC certifications.
This article outlines the essential QC steps every manufacturer or exporter should perform before an inverter leaves the factory, ensuring that every shipment meets the highest performance and safety standards.
1. Why QC Matters Before Shipment
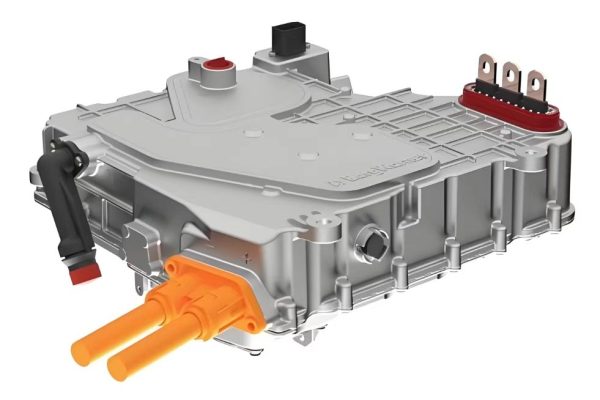
The inverter is the heart of any PV + storage system — converting DC to AC power, balancing charging, and protecting both batteries and loads.
If an inverter fails after installation, the cost of field replacement or overseas service can exceed the profit margin.
Therefore, a strict and documented QC workflow protects both the manufacturer and the client.
Key QC Goals
- Ensure correct electrical performance under load
- Verify firmware and parameter settings
- Confirm safety protections and communication interfaces
- Prevent damage during international transport
2. Step 1: Incoming Material Inspection (IQC)
Quality starts long before assembly. Every inverter depends on the consistency of its critical components — MOSFETs, IGBTs, transformers, PCBs, and capacitors.
QC Checklist:
✅ Verify supplier certificates (UL, CE, ISO9001)
✅ Check serial numbers and batch traceability
✅ Inspect PCB soldering, conformal coating, and connector fit
✅ Test key components for insulation resistance and leakage current
A robust IQC process ensures stable inverter performance and fewer warranty claims later.
3. Step 2: PCB and Module-Level Testing
Before system assembly, each functional module — control board, driver board, communication board — should pass independent bench tests.
Tests Include:
- Power-on functional test (no-load condition)
- Signal integrity verification via oscilloscope
- Communication protocol test (CAN, RS485, Modbus)
- Voltage calibration on key nodes
All modules are labeled with test dates and technician signatures for traceability.
4. Step 3: Assembly Line Quality Control
During assembly, QC engineers verify mechanical accuracy and wiring consistency.
Key Control Points:
- Torque testing of busbar and terminal screws
- Cable routing (separation between power and signal lines)
- Labeling and polarity marking
- Cooling fan installation direction
- Firmware version record (especially for hybrid inverters with BMS link)
At this stage, error-proofing (Poka-Yoke) systems help prevent assembly mistakes — e.g., wrong cable connection or reversed polarity.
5. Step 4: Functional Testing (100% Routine Test)
Each inverter must undergo a complete performance test before leaving the line.
This is the most critical QC step in the entire process.
5.1 Power-On Test
- Verify start-up sequence and display screen
- Confirm communication with EMS or monitoring software
5.2 Electrical Performance Test
- DC Input Voltage Range
- AC Output Voltage and Frequency
- Conversion Efficiency (typically >96%)
- MPPT Tracking Accuracy (for PV-hybrid inverters)
5.3 Protection Function Test
Each safety feature should trigger and recover correctly:
- Overvoltage / Undervoltage
- Overcurrent / Overload
- Short Circuit
- Reverse Polarity
- Overtemperature
5.4 Battery Compatibility Test
For hybrid inverters:
- Communicate with at least two BMS protocols (e.g., Pylontech, BYD, CATL)
- Verify charge/discharge current limits
- SOC synchronization accuracy
5.5 Isolation and Grounding Test
- High-pot test (e.g., 2.5 kV for 1 second)
- Ground continuity test (<0.1 Ω resistance)
5.6 Functional Burn-In
Many factories perform aging tests at elevated temperature (45–50°C) for 2–4 hours under 60–80% load.
This step helps detect early failures or unstable firmware.
6. Step 5: Environmental and Reliability Testing
For long-distance exports or outdoor applications, inverters must endure various environmental conditions.
Typical Tests:
- Temperature Cycling: -20°C to +55°C
- Humidity Test: 95% RH for 24 hours
- Vibration Test: simulating container transport
- Salt Spray Test: for coastal or marine projects
- IP Protection Test: water/dust ingress resistance
These are performed on sample units per batch to ensure design durability.
7. Step 6: Firmware and Configuration Verification
Incorrect firmware is one of the most common post-installation problems.
QC engineers should verify:
- Firmware version and checksum
- Default parameters (grid code, communication baud rate, BMS settings)
- System time and calibration
- Pre-loaded monitoring credentials (if cloud-based)
For export markets, firmware must comply with local grid standards — such as:
- VDE-AR-N 4105 (Europe)
- G98/G99 (UK)
- AS/NZS 4777.2 (Australia)
- IEEE 1547 (North America)
8. Step 7: Visual and Label Inspection
Buyers often judge product quality by its finish and labeling.
Before packing, inspectors check:
- Clean surfaces and undamaged paint
- Correct serial number and barcodes
- Consistent rating label (AC output, frequency, IP rating, certification marks)
- Proper orientation of warning labels and logos
All accessories (manuals, Wi-Fi dongles, mounting kits) must match the packing list exactly.
9. Step 8: Packaging and Drop Test
Even a perfectly tested inverter can arrive damaged if the packaging fails.
Packaging QC Includes:
- Use of anti-static and moisture-proof materials
- Foam thickness ≥ 40 mm for heavy inverters
- Carton edge compression test (ECT) > 44 lb/in
- Drop test from 80–100 cm for packages <50 kg
- Verification of pallet stacking stability
Every box should be labeled with handling symbols (“Fragile”, “This Side Up”, “Keep Dry”) and batch traceability.
10. Step 9: Final Quality Audit (FQA)
Before shipment, a Final Quality Audit team reviews:
- Test records from each QC stage
- Visual inspection report
- Packing photos
- Serial number registry
Only after FQA approval is a Certificate of Conformity (CoC) issued and the unit released for export.
11. Step 10: Third-Party Inspection (Optional)
For overseas buyers or OEM clients, an independent inspection agency (SGS, TÜV, BV, or Intertek) may verify:
- Function test results
- Packaging integrity
- Random unit sampling
Providing third-party reports builds buyer confidence and simplifies customs clearance.
12. Documentation Package for Each Shipment
Every inverter shipment should include:
📘 User Manual and Quick Start Guide
📋 Factory Test Report (with serial number)
📄 Certificate of Conformity / Warranty Card
📦 Packing List and Invoice
Digitally, it’s best to archive all QC data in the manufacturer’s ERP system — allowing quick lookup if a unit fails in the field.
13. Common QC Mistakes to Avoid
- Skipping battery communication testing for hybrid models
- Using outdated firmware versions
- Missing torque checks on power terminals
- Insufficient aging test duration
- Lack of documentation linking serial numbers to test reports
Each of these can lead to field failures, delayed commissioning, or costly returns.
14. Benefits of Strong QC Before Shipment
| Benefit | Impact |
|---|---|
| Fewer warranty claims | Saves service cost and improves reputation |
| Faster installation | Buyers trust pre-tested performance |
| Higher export credibility | Easier certification and customs release |
| Better data traceability | Simplifies root-cause analysis |
| Stronger brand image | Demonstrates professionalism |
Inverters may look identical from the outside, but the difference between a reliable brand and a risky supplier lies in their quality control discipline.
A structured QC process — from incoming materials to final shipment — ensures every inverter:
- Performs safely under field conditions
- Meets international standards
- Arrives in perfect condition
For energy storage exporters, strict QC isn’t just a technical process — it’s a strategic commitment to building long-term trust with global buyers.
