


Practical Design Guide for Light Commercial Solar+Storage Integrators
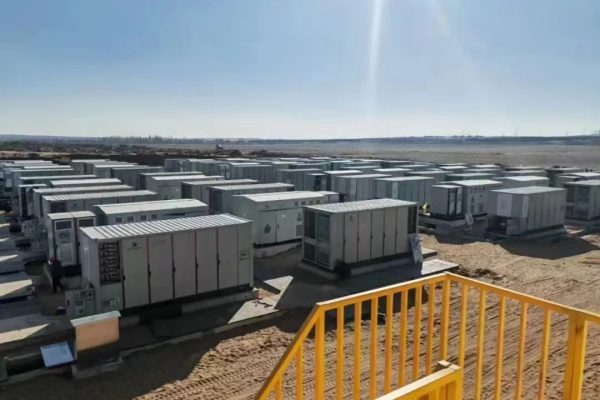
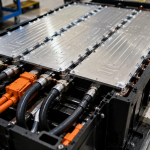
Combining the PV inverter, battery, and BMS into a single cabinet has become increasingly popular in small-to-mid-sized energy storage projects, particularly in 10kW to 50kW hybrid systems. These 3-in-1 cabinets simplify deployment, reduce onsite wiring time, and allow for clean packaging, especially in commercial or institutional buildings.
But how do you design such a system correctly, both electrically and mechanically?
This article explores the key components, integration workflow, safety considerations, and use cases for building your own 3-in-1 cabinet solution.
🧱 What Is a 3-in-1 Cabinet?
A 3-in-1 cabinet typically refers to a single enclosure that contains:
- 🔌 Hybrid inverter (DC/AC + MPPT)
- 🔋 Battery pack (usually LFP, 48V/100V/200V)
- 📡 Battery Management System (BMS) or EMS
It may also include:
- Breakers & SPD
- ATS (optional)
- WiFi/4G monitoring module
- Fans or active cooling
This is not just a battery cabinet — it’s a compact, factory-preconfigured power center for grid-tied or backup applications.
🛠️ Core Components to Include
| Component | Function |
|---|---|
| Hybrid Inverter | Converts PV to usable AC, manages grid/backup |
| Battery Modules | Stores energy for self-use or outage supply |
| BMS | Monitors battery status, handles safety/protection |
| DC/AC Breakers | Provide electrical isolation and protection |
| SPD (Surge Protection) | Shields system from overvoltage due to lightning etc. |
| Wiring Busbars | Ensure clean and low-resistance internal layout |
| Cabinet Enclosure | Holds all components; ensures IP protection, cooling |
| Display or HMI (optional) | Interface for status and control |
📐 Step-by-Step Design Process
1. Choose the Cabinet Size & Layout
- Size must accommodate:
- Inverter footprint
- Battery stack or rack
- Cable routing space
- Ventilation paths
➡️ Example: For a 15kW inverter and 30kWh battery at 100V, you may need a 1000mm x 600mm x 1800mm rack.
2. Select Compatible Components
- Ensure voltage and protocol compatibility:
- Inverter supports battery voltage range
- BMS communicates via CAN/RS485 with inverter
- Battery modules can be stacked or mounted securely
📌 Brands like Growatt, Deye, Solis, GoodWe, Sofar offer communication protocol documents—match before selecting.
3. Plan Electrical Layout
- PV input enters via top/bottom gland
- AC output to load/grid via terminal block
- Batteries wired in series or parallel depending on voltage target
- All internal wiring should be:
- Labeled
- Tied or ducted
- Sized per current rating
Use busbars instead of daisy-chaining cables to reduce heat and ensure neatness.
4. Integrate BMS and Communications
- Mount BMS or include smart battery with internal BMS
- Connect CAN or RS485 to inverter
- Assign correct address (e.g., 0x01 for master)
- Ensure termination resistors are applied if needed
🔧 Tip: Keep CAN/RS485 cable runs short, use twisted shielded pair, and test communication before sealing the cabinet.
5. Add Monitoring and Protection
- Include:
- Surge protection device (AC & DC side)
- Breakers/fuses for inverter, battery, PV
- Optional: WiFi/4G module with antenna hole
- Optional: display screen or simple LED indicators
🔒 Safety & Certification Tips
- Use a cabinet with IP54 or above if installed outdoors
- Add over-temperature and smoke sensor in battery area
- Provide a manual DC disconnect switch
- Apply CE/UL-rated components if exporting
- Label all terminals clearly (PV+, PV-, BATT+, AC OUT, etc.)
📌 Remember to ground both the cabinet body and system ground bus internally.
🌡️ Thermal Management
3-in-1 systems tend to build heat, especially when charging/discharging at high current or during full-sun inverter use.
- Use vented panels with dust filters or
- Add exhaust fans with thermostat
- In hot/humid areas: consider a cabinet air conditioner or heat exchanger
Avoid stacking batteries directly beneath inverters unless well-ventilated.
🧪 Pre-Shipping Testing
Before deploying or shipping a cabinet, perform:
- ✅ Battery charging/discharging test
- ✅ Inverter grid sync and MPPT function test
- ✅ CAN/RS485 comms check
- ✅ Isolation & grounding continuity test
- ✅ Thermal imaging during 30 min load
Document each pass/fail and include a QR code on the cabinet for remote support materials.
✅ When Does a 3-in-1 Cabinet Make Sense?
Ideal for:
- School, clinic, or rural commercial projects (10–30 kW)
- Sites with no technical team on-site
- Projects requiring fast deployment (plug-and-play)
- Repetitive deployments (telecom, franchise retail, mobile ATMs)
Not ideal for:
- Systems requiring regular battery expansion
- Sites with space constraints or complex load groups
- Projects with strict indoor air safety rules (e.g., data centers)
🔚 Conclusion: A Cabinet is More Than a Box
A 3-in-1 cabinet is an opportunity to simplify solar+storage deployments, but it must be professionally engineered to avoid becoming a source of heat, noise, or failure.
As a system integrator or value-added reseller, offering pre-integrated cabinets helps you win trust, reduce onsite errors, and deliver faster ROI to clients.